
- July 21, 2026
- 0 Comments
Medical Device Process Guide: From Prototype to Production
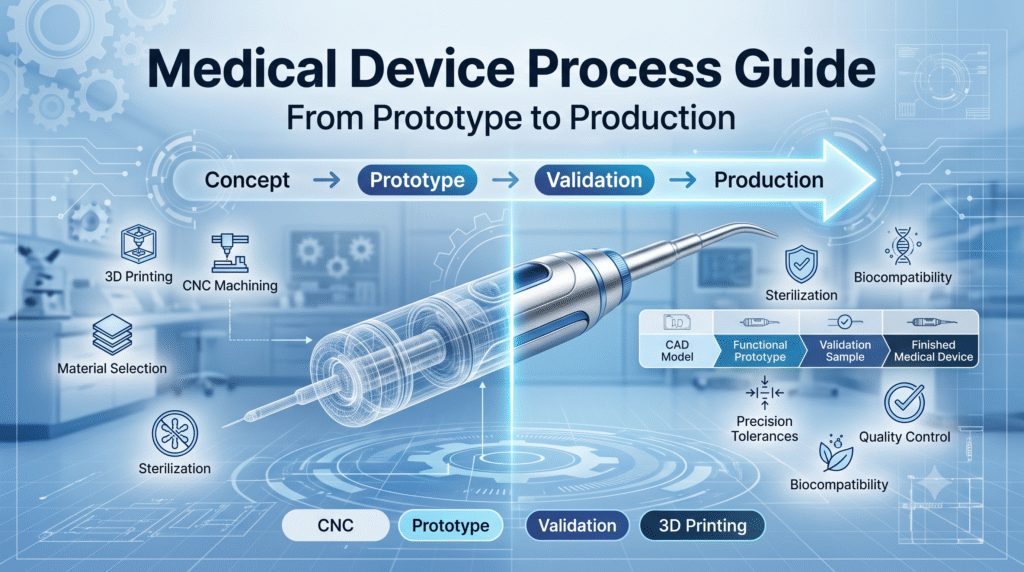
Medical device development works best when prototyping and manufacturing are treated as one connected system rather than as isolated phases. In practice, teams move from concept models to functional prototypes, validation samples, pilot builds, and then stable production while refining materials, processes, tolerances, finishes, and sterilization strategy along the way.
Why process planning matters
A medical device is rarely successful because of geometry alone. Material behavior, surface finish, assembly fit, cleanability, sterilization compatibility, and traceability all influence whether a design performs consistently in use and can be produced repeatably at scale.
That is why early design choices should already reflect likely manufacturing realities. A prototype that looks correct but ignores production shrinkage, tolerance stack-up, or reprocessing limits can trigger expensive redesign later in development.
Quick checklist
- Define the device’s intended contact and duration early.
- Match the prototype method to the learning goal, not just the fastest process.
- Tighten tolerances only on features that drive function.
- Evaluate finish, cleaning, and sterilization as part of the same design decision.
Prototype stages
1. Concept prototypes
Concept prototypes are built to test form, size, ergonomics, and general usability before deep investment in tooling or final-process decisions. At this stage, speed matters more than perfect production realism, so teams often use fast-turn methods such as 3D printing or simple CNC work to learn quickly.
Best for: shape studies, clinician feedback, enclosure layout, handle comfort, and workflow mockups.
2. Functional prototypes
Functional prototypes move beyond appearance and begin testing how the device works. This is where motion, fluid flow, sealing, alignment, durability, and user interaction start to matter, so the chosen materials and processes often need to resemble the intended production route more closely.
For example, CNC machining is useful when the prototype needs accurate bores, threads, or close-tolerance interfaces, while additive manufacturing is useful when geometry changes are still frequent or the part is highly complex. Prototype injection molding can become relevant when teams need to understand how a polymer part behaves closer to a production environment.
3. Validation samples
Validation samples bridge the gap between development and manufacturing readiness. These builds are typically used to verify critical dimensions, material selection, finish quality, assembly behavior, and the part’s response to cleaning or sterilization.
At this point, the device should increasingly resemble the real product, not just in shape but in process intent. If the final device will require biocompatibility review, sterilization validation, or repeatable assembly controls, those expectations should influence the validation sample strategy.
Materials
Material selection in medical devices is more demanding than in general industrial products because the decision must reflect intended contact, sterilization method, mechanical performance, and available evidence for safety and compatibility. Common medical materials include metals such as stainless steel and titanium, polymers such as polypropylene, polycarbonate, PEEK, and PPSU, and elastomeric materials such as silicone for seals and flexible interfaces.
Material guide
|
Material family |
Typical role |
Why it is used |
Key caution |
|
Stainless steel / titanium |
Instruments, structural parts, reusable parts |
Strength, durability, precision machining |
Finish and corrosion behavior still need review |
|
PP / PC / PEEK / PPSU |
Housings, handles, fluid-contact parts |
Lightweight, moldable or machinable, broad use in medical products |
Sterilization compatibility varies by polymer |
|
Silicone / elastomers |
Seals, grips, flexible interfaces |
Soft contact and sealing performance |
Aging and sterilization effects must be checked |
|
3D-print materials |
Prototypes, fixtures, selected low-volume parts |
Fast iteration and geometry freedom |
Post-processing and validation are often critical |
Prototype materials do not always need to match final production materials, but the reason for the substitution should be clear. A concept model may use a convenient polymer for speed, while a validation sample may need final-grade material because the goal is to assess performance after sterilization or under realistic loading
Manufacturing routes
Medical device manufacturing usually relies on a mix of process routes rather than a single universal method. CNC machining is preferred for precision parts and tight-tolerance features, injection molding is preferred for repeatable high-volume polymer components, and 3D printing is valuable for rapid prototyping, custom geometries, fixtures, and selected low-volume applications.
Process comparison
|
Process |
Best use |
Strength |
Watch-out |
|
CNC machining |
Tight tolerances, threads, bores, precision components |
High accuracy and strong material options |
Cost rises if too many features are over-specified |
|
Injection molding |
Production plastic parts at scale |
Good repeatability and low unit cost at volume |
Tooling cost and shrinkage must be planned |
|
3D printing |
Fast iteration, fixtures, complex forms |
Speed and flexibility |
Surface finish and repeatability can differ from production |
|
Assembly and integration |
Final device build |
Traceability and system-level control |
Small stack-up errors can affect device function |
A development team may begin with 3D printing, move to CNC for tighter functional testing, and then transfer to injection molding or another scalable process once geometry and risk are more stable. This staged approach helps reduce the gap between what works in a lab model and what can be manufactured consistently.
Surface finish and fits
Surface finish is not only a cosmetic issue in medical products. Smooth, controlled surfaces can support sealing performance, moving contact, corrosion resistance, cleanability, and the reduction of contamination-prone crevices.
Common finishing routes include deburring, polishing, passivation for stainless steel, anodizing for aluminum, and post-processing steps for printed components. These decisions matter because finishing can change dimensions, alter performance at mating surfaces, and affect how well a part tolerates repeated cleaning or sterilization cycles.
Fit logic
- Clearance fit: best where movement or easy assembly is required.
- Transition fit: useful where alignment matters more than free motion.
- Interference fit: used where retention or rigidity is the primary goal.
Medical parts often require different levels of dimensional control across the same component. Features such as bores, threads, seals, and mating interfaces may need tight tolerances, while noncritical cosmetic faces can often remain looser to reduce cost and manufacturing burden.
Sterilization and biocompatibility
Biocompatibility and sterilization are central to medical-device process planning, not late-stage add-ons. FDA guidance around ISO 10993-1 emphasizes evaluating biological risk in the context of the device’s nature and duration of contact, while sterilization compatibility must be considered alongside material and finish choices.
This means a device that performs well mechanically may still need redesign if the selected material degrades under repeated sterilization cycles or if its surface treatment complicates cleaning and reuse. For reusable products in particular, finish, geometry, and material behavior all interact with reprocessing performance.
How to use this guide?
Use the guide as a design review tool by asking five questions for every part or subassembly:
- What is the part meant to do, mechanically and clinically?
- Which prototype stage is appropriate now: concept, functional, validation, or pilot build?
- Which material best matches contact type, sterilization plan, and performance needs?
- Which process can produce the geometry and tolerances realistically at the intended volume?
- Which finish and fit strategy protects function without over-specifying the part?
Using the guide this way keeps development grounded in process reality and makes discussion easier across design, manufacturing, sourcing, and quality teams.
References
- Stages of medical device development: concept, prototyping, testing, verification and production.
- Prototype-to-production transfer considerations in medical development.
- Material and process selection guidance for medical device applications.
- FDA and ISO-linked biocompatibility evaluation guidance.
- Prototyping methods and low-volume manufacturing routes for medical parts.
- Manufacturing and machining considerations for medical components.